
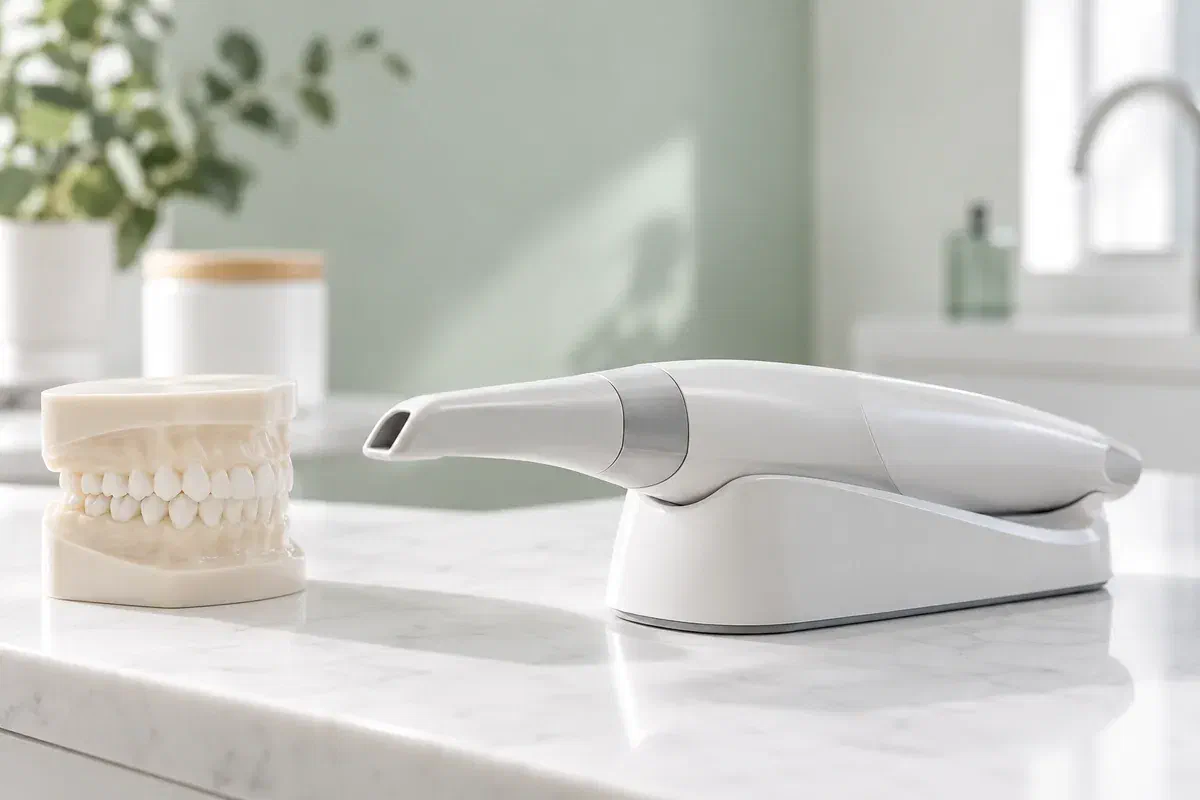
Illustrative discussion of an optical dental scanner, not a photograph of clinic equipment
General & Family Dentistry

Digital Dental Impressions in Georgetown

During a scan you may notice your teeth forming on a screen, with a few blank patches. For anyone coming from Georgetown, here is what that model is, why some areas are recorded twice and how it feeds into a crown or appliance.

Seeing the scan, for Georgetown visitors

Watching your teeth appear, patch by patch.

Partway through, you might glance at the monitor and see a coloured, three-dimensional version of your teeth taking shape, with a few holes still to be filled. That image is the impression. An optical scanner captures hundreds of views of the teeth and nearby tissue and stitches them into a surface model, which is then used to plan or make a restoration or appliance.

What you are watching is data collection rather than treatment. In suitable cases this approach can stand in for a tray of impression material. Whether it applies to you depends on the area being recorded, the work proposed and how fine the detail must be. A scan that looks complete on screen may still need extra passes, and finished work may still need adjusting.

Before the appointment, ask how your impression will be taken and what arrangements are available. If gagging, a tight jaw or an earlier uncomfortable impression is a concern, mention it. Our team can explain the steps and talk about suitability, rather than assuming one method suits every mouth.

Ask what the scan will involve
Illustrative unbranded optical scanner beside a dental teaching model
Why a scan might be booked

Behind every model is a treatment plan.

A scan should be recording something specific. Ask which teeth and surfaces are needed and how the finished model will be used to design or make your work.

Work that needs an accurate model

For a crown or other suitable restoration, the prepared tooth, its neighbours and the bite may all need detail. Some appliances need a whole arch. The dentist will explain what your case requires, so the scan is taken with a clear purpose.

Finding trays difficult

If the bulk or taste of impression material has been a problem, describe it. Scanning may be worth considering when it suits the work, but the tip still travels around the teeth and some people still find it uncomfortable.

Teeth that look different from before

Drifting teeth, a newer filling or a shift in the plan can all leave an earlier model out of step with your mouth. Tell the team. A previous model is reused only if it still shows what the current treatment depends on.

The coloured model on screen shows outer surfaces only. It is not an X-ray or CBCT image, and it cannot replace imaging needed to examine roots, bone or what lies beneath the visible tooth.

Why the live view matters

Gaps you can see are gaps that can be filled.

Because the model builds in real time, missing or blurry areas tend to show up as blank or distorted patches. The team can go back over those spots before the record is accepted and passed on to the clinical and laboratory steps. That is the real advantage: a record checked for usability while you are still in the chair.

Some people also find a scan easier than holding a full tray in place, while others notice little difference. How long it takes depends on how much has to be captured and how readily each area records. Agree beforehand on a signal for breaks, how far you can open and how you would like to sit.

Patient information: UCLH — digital impressions in dental care

Understanding the colours and shapes

Where the system allows, the team can explain what the model shows and why teeth beside the one being treated, or on the opposite jaw, are included. It is a planning picture and does not diagnose anything on its own.

A file the lab can open

Once approved, the model can travel digitally to whoever designs and produces your piece, through the proper professional channels. It is fair to ask who that is. Sending the file does not, on its own, decide when your work will be ready.

Second passes are normal

The record must include every detail the planned piece depends on. Rescanning a patch, or switching to another method, is an ordinary part of getting there and not a sign that something went wrong.

From first pass to final check

How the on-screen model comes together.

Each visit depends on the treatment it supports. Some appointments are purely for capturing the model; others also include shaping a tooth or fitting a temporary, so check which applies to you.

  1. Explain what will be captured

    The dentist describes which teeth the model must show, what it will be used for and whether a scan is the right tool in your case. Ask about limits, alternatives and any fees, and mention gagging or difficulty opening before starting.

  2. Dry and expose the surfaces

    Moisture and soft tissue can block the scanner’s view, so the teeth may be dried and the gum around a tooth gently managed, depending on the procedure. A tooth shaped for a crown needs its edges clearly visible.

  3. Build the model, then fill the gaps

    The wand moves slowly over each relevant tooth while the image grows. The team watches for blank patches and returns to them, then may record the opposite teeth and how your bite closes. Signal whenever you need a pause.

  4. Confirm the model is ready

    Once the record looks complete, the team checks it against what the work requires. If an area still falls short, another method may be used. Leave knowing your next appointment, any temporary care steps and when fitting will happen.

After the screen goes dark

Your care continues while the work is made.

A scan alone does not usually need any recovery. If freezing, tooth shaping or a temporary was part of the same visit, those may come with their own instructions.

Protect the temporary

Follow the dentist’s advice on eating and cleaning around any temporary restoration. If it loosens, breaks or hurts, call the clinic. The permanent crown being on screen somewhere does not mean a cracked stand-in can be left as it is.

Report changes that could affect the model

A chipped tooth, a filling replaced elsewhere or a bite that changes after the scan may mean the record no longer matches. Let us know. Any new ache or puffiness is worth having checked, not filed under waiting.

Keep your fitting visit

When the finished piece arrives, it still has to be tried in and checked. Bring up how it fits, how your bite feels and how to keep it clean, and expect small adjustments if needed. A digital process does not skip this step.

Other ways to record

When the scanner isn’t the whole answer.

The dentist considers what information is needed and how reliably each approach can collect it. Ask why a particular method is suggested, rather than assuming the most technical-looking option is best.

Where surface detail is what the work needs

Intraoral scan

The scanner produces a surface model for a suitable restorative or appliance workflow. Confirm it is appropriate and available for you. Capturing the model is a first stage, with assessment, design, manufacture and fitting following on.

Where a physical mould is recommended

Impression tray

Certain clinical needs or arrangements are still best met with impression material. If trays have been hard for you, explain why so the team can plan around it. A material impression does not make the end result any less good.

Where the model leaves questions open

More records

Photographs, bite records, X-rays or a further impression may each answer a different question. Ask what they add. A surface model cannot show everything about a tooth, the tissues supporting it or whether treatment is suitable.

Georgetown questions about what you see

About the screen, the gaps and the passes.

Curiosity about the screen is welcome. Raise anything about the planned work, the recording method or the steps after the model is finished, and expect answers that tie what you see to a real clinical purpose.

(905) 876-4488
What are the gaps or holes I see in the model on screen?
They are areas the scanner has not captured clearly yet, often because of moisture, angle or soft tissue in the way. The team fills them in with further passes before deciding whether the record is complete enough.
Does saliva affect a digital impression?
It can. Moisture may blur or block parts of the image, which is why the team may dry the teeth or use suction during scanning. Swallowing between sections is fine; just let the team know when you need to.
Why does the team blow air on my teeth during the scan?
A gentle stream of air helps dry the surfaces so the scanner can read them clearly. If your teeth are sensitive to air, mention it before starting so the team can work with you and take breaks as needed.
Are crowded or overlapping teeth harder to scan?
They can be, because some surfaces are tucked behind others. The team may need extra passes or different angles. If a reliable record cannot be obtained, another method or additional records may be suggested.
Will the scanner actually touch my teeth?
The tip may rest lightly on teeth or move close to them as it is guided around your mouth. You may also feel it against your cheek or tongue. If anything feels uncomfortable, signal and the team can pause.
Will I see the finished model before it goes to the lab?
If the system and time allow, the team can show you the completed model and explain what it captured. Ask during the appointment. Remember it is a planning record, and the dentist decides whether it is suitable to send on.
From Georgetown to our chair

Curious about the scan? Ask us to walk you through it.

Give our Bronte Street practice a call with the crown, bridge or appliance you have in mind and anything you are curious about on the scanning side. The team will describe which records are likely, how long they tend to take and what arrangements are possible. Comfort and scheduling questions are fine to raise as well.

Scanning suitability and availability depend on your treatment. Illustrations of scanners on this page do not show clinic equipment.

Visit Milton Dental Clinic
Unit 1, 342 Bronte St. S, Milton, ON L9T 5B7
Get directions Clinic hours
Monday–Thursday
11am–7pm
Friday–Sunday
By appointment only

Areas we serve

  • Milton
  • Oakville
  • Mississauga
  • Georgetown
  • Halton Hills
  • Acton
  • Campbellville
  • Brampton
  • Burlington
  • Puslinch
  • Rockwood
  • Erin
  • Caledon
  • Etobicoke
  • Old Milton
  • Bronte Meadows
  • Timberlea
  • Dorset Park
  • Dempsey
  • Clarke
  • Beaty
  • Coates
  • Harrison
  • Scott
  • Willmott
  • Ford
  • Bowes
  • Cobden
  • Walker
  • Mountain View
  • Milton Heights
  • Hawthorne Village
  • Valley View
  • Fallingbrook
  • Nassagaweya
  • Trafalgar
  • Esquesing
  • Nelson
  • Brookville
  • Moffat
  • Glen Williams
  • Norval
  • Limehouse
  • Stewarttown
  • Ashgrove
  • Hornby
  • Silver Creek
  • Speyside
  • Scotch Block
  • North Oakville
  • River Oaks
  • Glen Abbey
  • West Oak Trails
  • Palermo
  • Bronte Creek
  • College Park
  • Joshua Creek
  • Uptown Core
  • Preserve
  • Iroquois Ridge
  • Lisgar
  • Meadowvale
  • Meadowvale Village
  • Churchill Meadows
  • Erin Mills
  • Central Erin Mills
  • Streetsville
  • East Credit
  • Creditview
  • Heartland
  • Sheridan
  • Mount Pleasant
  • Credit Valley
  • Huttonville
  • Churchville
  • Springbrook
  • Northwest Brampton
  • Bram West
  • Fletcher's Meadow
  • Fletcher's Creek South
  • Alton Village
  • Orchard
  • Millcroft
  • Headon Forest
  • Tansley
  • Brant Hills
  • Tyandaga
  • Kilbride
  • Lowville
  • Aberfoyle
  • Morriston
  • Arkell
  • Hillsburgh
  • Freelton
  • Carlisle
  • Waterdown
  • Flamborough
  • Mountsberg

How can we help?

Milton Dental Clinic

Have a question about your smile? Choose the option that works best for you.

For urgent dental concerns, please call.
Messages are reviewed during clinic hours.